
This is the legacy 4D documentation web site. Documentations are progressively being moved to developer.4d.com
- 4D Design Reference
-
- Working with active objects
-
-
 What are active objects?
-
 Field and variable objects
-
Buttons
-
3D Buttons, 3D Check Boxes and 3D Radio Buttons
-
Picture Buttons
-
Button Grids
-
Check Boxes
-
Radio Buttons and Picture Radio Buttons
-
Pop-up Menus/Drop-down Lists
-
Combo Boxes
-
Hierarchical Pop-up Menus and Hierarchical Lists
-
Picture Pop-up Menus
-
Indicators
-
Tab Controls
-
Splitters
-
Web areas
-
Plug-in areas
-
List boxes
-
Subforms
-
Splitters
A splitter divides a form into two areas, allowing the user to enlarge and reduce the areas by moving the splitter one way or the other. A splitter can be either horizontal or vertical. The splitter takes into account each object’s resizing properties, which means that you can completely customize your database’s interface. A splitter may or may not be a “pusher.”
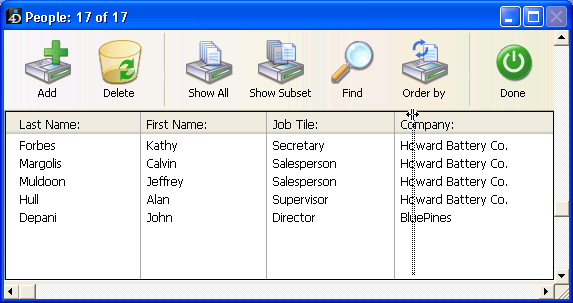
The splitter is generally used in output forms so that columns can be resized:
Here are some of the splitter’s general characteristics:
- You can place as many splitters as you want in any type of form and use a mixture of horizontal and vertical splitters in the same form.
- A splitter can cross (overlap) an object. This object will be resized when the splitter is moved.
- Splitter stops are calculated so that the objects moved remain entirely visible in the form or do not pass under/next to another splitter. When the Pusher property is associated with a splitter, its movement to the right or downward does not encounter any stops.
- If you resize a form using a splitter, the new dimensions of the form are saved only while the form is being displayed. Once a form is closed, the initial dimensions are restored.
Once it is inserted, the splitter appears as a line. You can modify its border style to obtain a thinner line or change its color. You can also use an invisible button with the Automatic Splitter standard action as a splitter (see Standard actions).
In a form, splitters interact with the objects that are around it according to these objects’ resizing options:
| Resizing options for the object(s) | Object(s) above the horizontal splitter or to the left of the vertical splitter (1) | Object(s) below the horizontal splitter or to the right of the vertical splitter | |
| non-“Pusher” splitter | “Pusher” splitter | ||
| None | Remain as is | Are moved with the splitter (position relative to the splitter is not modified) until the next stop. The stop when moving to the bottom or right is either the window’s border, or another splitter. | Are moved with the splitter (position relative to the splitter is not modified) indefinitely. No stop is applied (see the next paragraph) |
| Resize | Keep original position(s), but are resized according to the splitter’s new position | ||
| Move | Are moved with the splitter |
(1) You cannot drag the splitter past the right (horizontal) or bottom (vertical) side of an object located in this position.
Note: An object completely contained in the rectangle that defines the splitter is moved at the same time as the splitter.
The Pusher property is available for splitter objects in the “Resizing Options” theme of the Property List. When a splitter object has this property, other objects to its right (vertical splitter) or below it (horizontal splitter) are pushed at the same time as the splitter, with no stop.
Here is the result of a “pusher” splitter being moved:


When this property is not applied to the splitter, the result is as follows:

This property is checked by default for new databases.
You can associate an object method with a splitter and it will be called with the On Clicked event throughout the entire movement.
A variable of the Longint type is associated with each splitter. This variable can be used in your object and/or form methods. Its value indicates the splitter’s current position, in pixels, in relation to its initial position.
- If the value is negative: the splitter was moved toward the top or toward the left,
- If the value is positive: the splitter was moved toward the bottom or toward the right,
- If the value is 0: the splitter was moved to its original position.
You can also move the splitter programmatically: you just have to set the value of the associated variable. For example, if a vertical splitter is associated with a variable named split1, and if you execute the following statement: split1:=-10, the splitter will be moved 10 pixels to the left — as if the user did it manually. The move is actually performed at the end of the execution of the form or object method containing the statement.
Use the Automatic Splitter action (see Standard actions) to create custom splitters in your forms. You can assign this action to an object of the invisible button type. When an invisible button is assigned this standard action, it acts exactly as a splitter. If, for example, you paste a picture on the invisible button, you can create a custom interface for your splitters. For more information about this type of button, refer to Buttons.

Product: 4D
Theme: Working with active objects
4D Design Reference ( 4D v20 R7)


